


Update
an ex-coworker, Sean Werner from Qtec advises me that this method now only works when using the “Common Area Phone” profile and Re-ordering the App order. I’ll update this when I get a chance, but for now, take a look at Jeff Schertz article on Teams IP Phone profiles
What? Why? How?
With businesses slowly starting to return to work in certain parts of the world everyone is implementing Covid-Safe workplaces. Keeping 1.5M apart, reducing onsite staff counts and even placing up perspex barriers to prevent contact with each other is becoming a normal way of life.
But what about your reception during these periods? With the lower staff counts, it may not be economical to have a dedicated receptionist. Yet we still need a way for walk-in customers, couriers and deliveries to be handled in a simple and easy way.
If only there was a way to have a single button so someone could see who or what was at reception and if they needed to come out to the front of the building.
Enter Teams Call Queues and a Video Phone.
With an appropriate Teams Native device running June 2020 firmware or better and some free licences in Office365. We can setup a call queue that automatically routes the call to an available agent and even supports video!
Tested Firmware’s
Yealink VP59: 91.15.0.38
Create a Resource Account
First things first, all objects in Teams that can receive a call need an Azure AD account. So we must create a Resource account for it
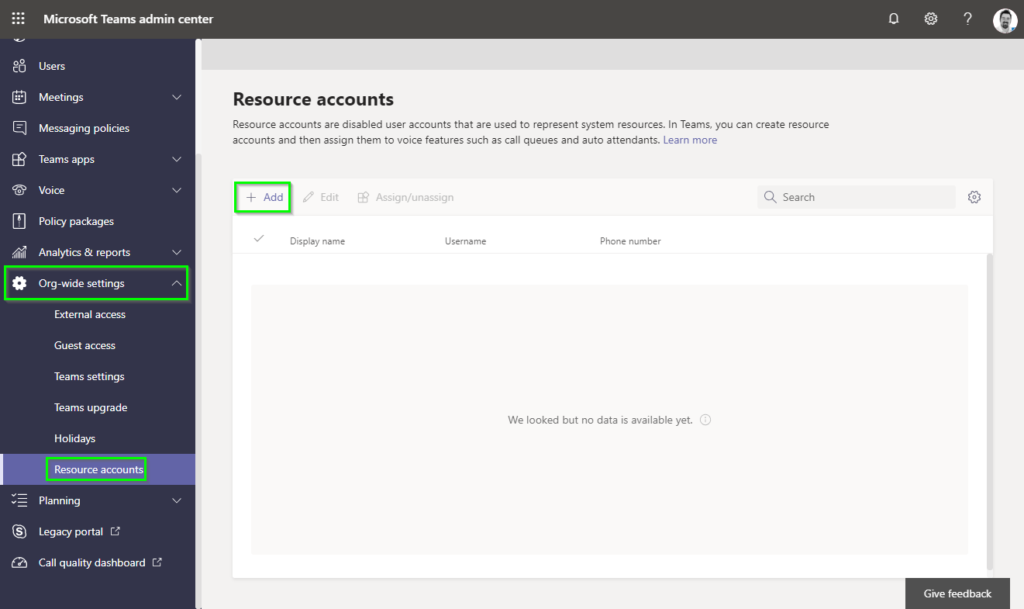
Head over to your Teams Admin Center, navigate to Org-wide Settings > Resource Accounts and click on + Add
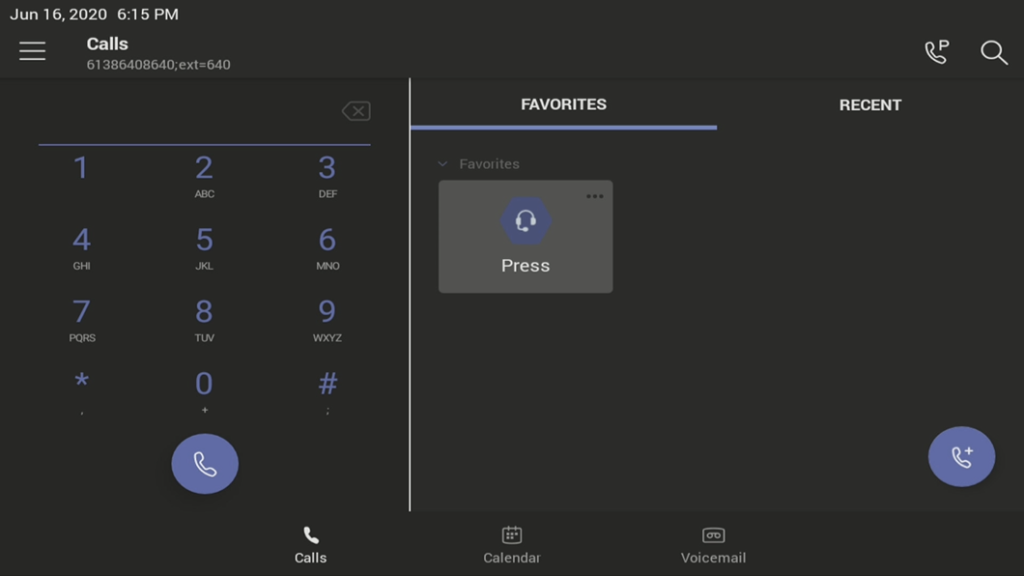
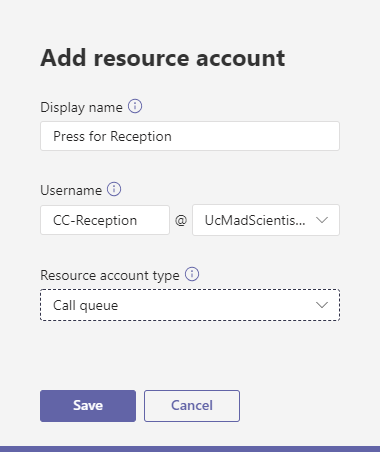
The Display Name of the Resource account is what will appear on the speed dial of the phone, it also cant be changed after the resource account is created. So make sure you pick wisely! I used “Press for Reception”
As for the Username, you can use your normal naming convention here. But make sure you set the Resource Account Type to Call Queue
Click Save when you are done.
Aquire Virtual licenses
By default, if you have a Teams voice-enabled tenant (at least one user as a Microsoft Phone System license) you are entitled to claim 25 free Microsoft 365 Phone System – Virtual User licenses.
Don’t worry though you aren’t limited to 25 licences. For every 10 Teams users, you enable with Phone System, you are eligible to claim 1 additional virtual user licence. So if you have 1000 users, You can enable 125 virtual user licences. (More info here)
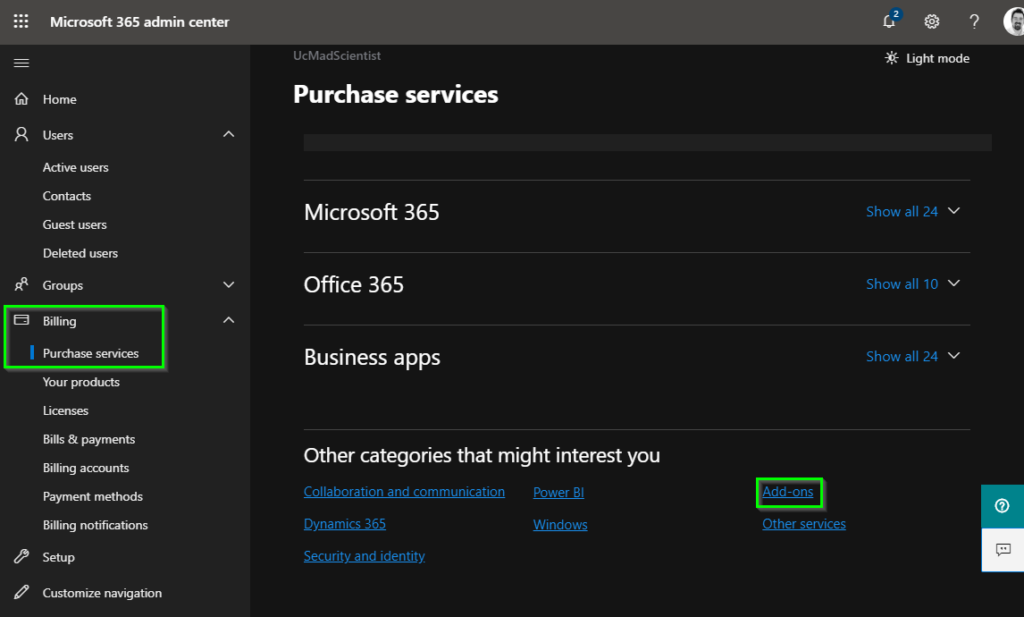
To claim your virtual licenses, in the Office 365 admin center, navigate to Billing > Purchase Services and click Add-ons at the bottom.
Scroll down and look for the Microsoft 365 Phone System – Virtual User product and click on it.
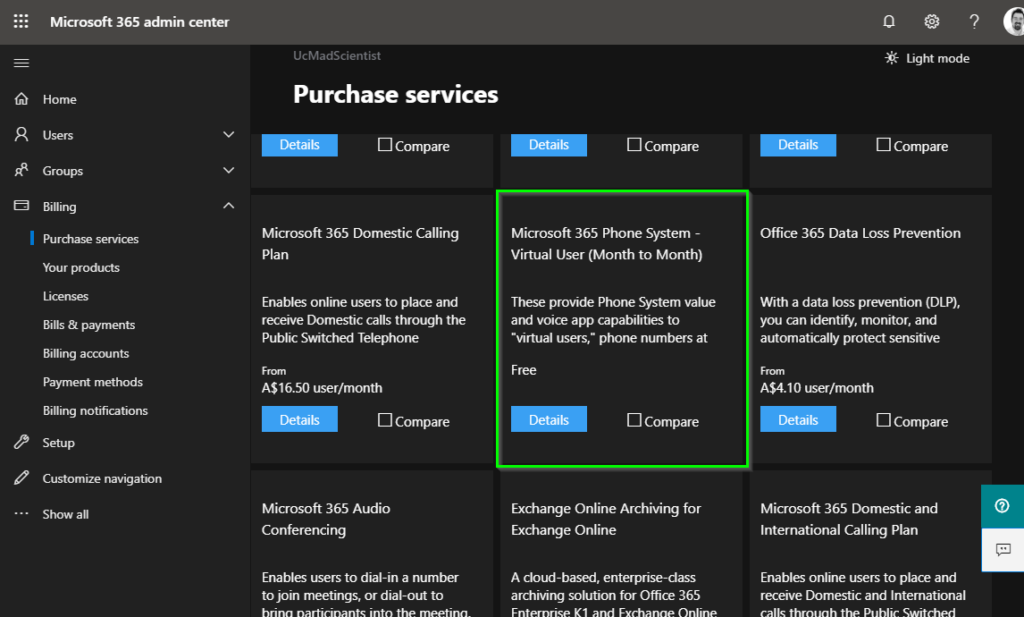
You will notice that the “purchase” you are making is free. So pick the number of licences you need (in my case 20) and click on Check out now.
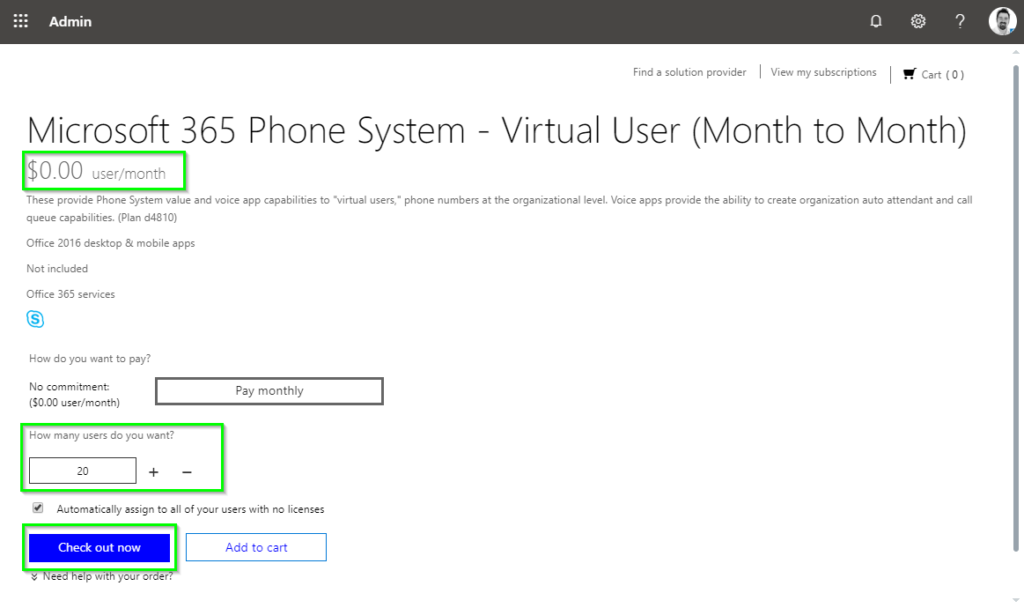
Fill in the normal licensing info and click on Next

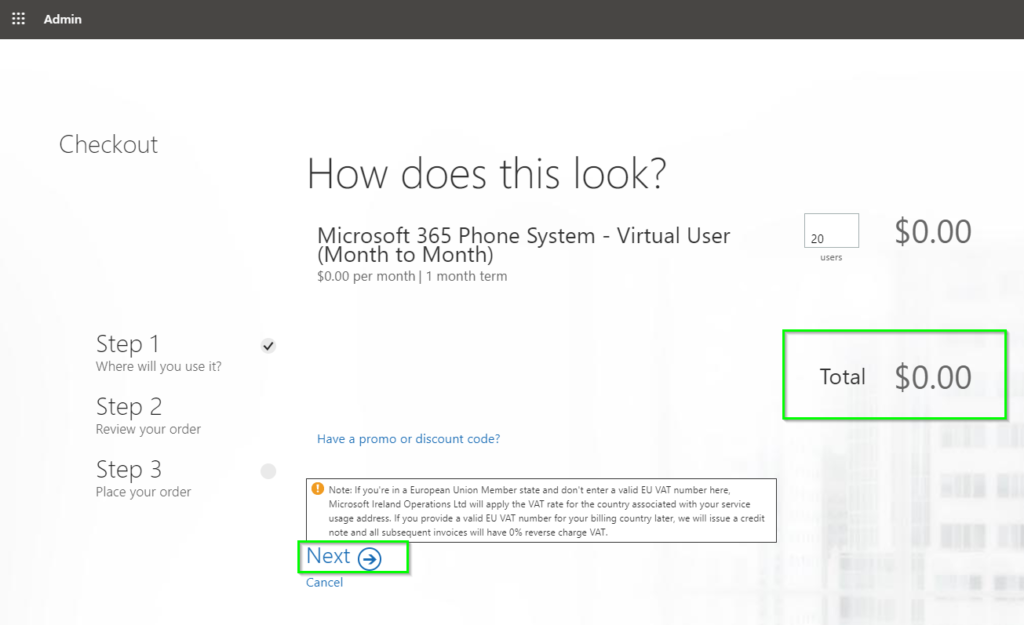
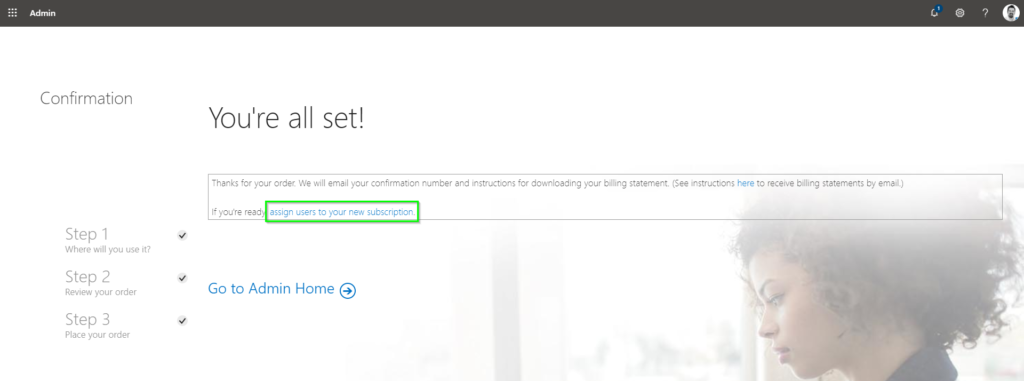
Microsoft will ask you to confirm your “order”, Check everything is $0.00 as expected and click Next
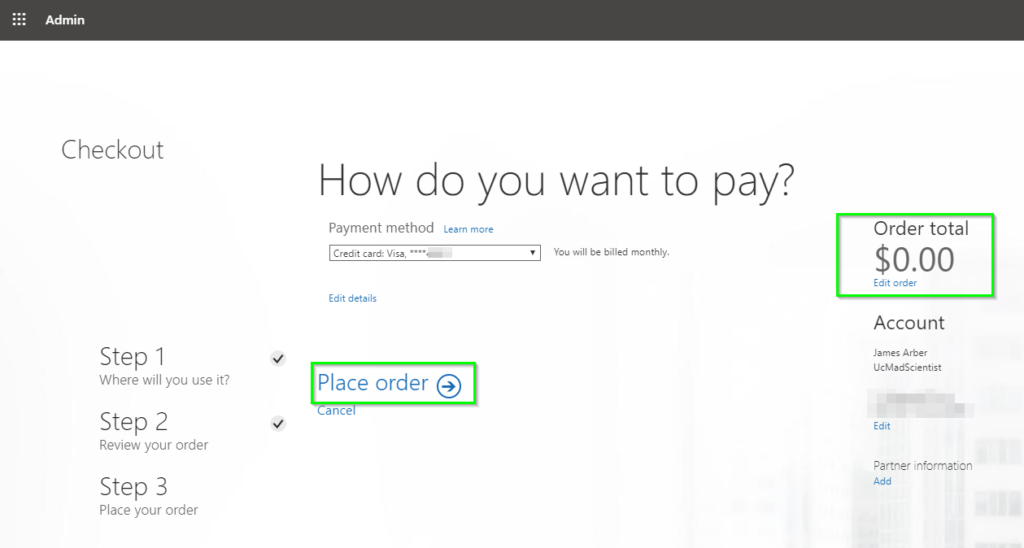
Lastly, you will be asked to confirm your order and select a payment method. Nothing came out from my account when I ran this so I assume its just a standard process.
Once that’s done we can head over to the license assignment page to assign these licenses to a resource account
Assign a virtual license to the resource user
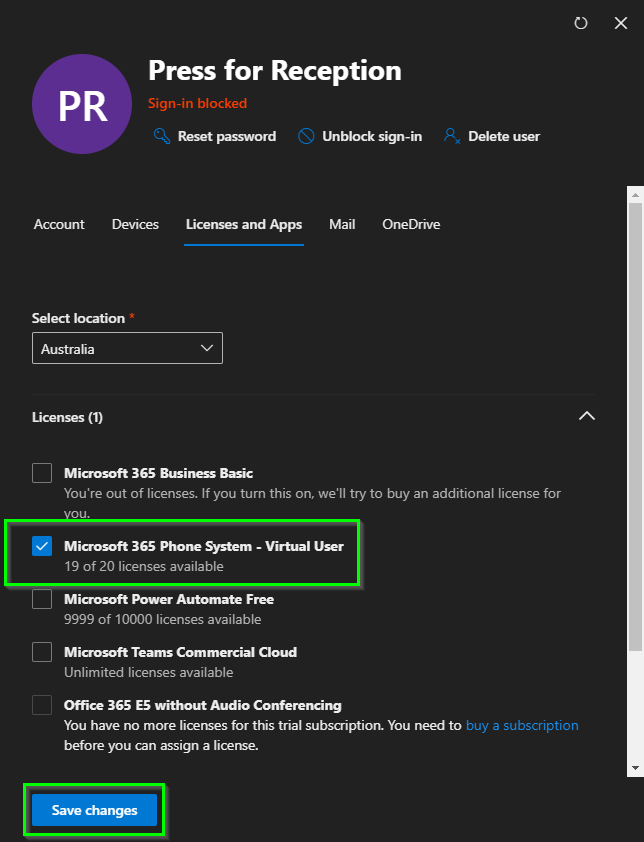
Now that you have virtual licenses (or you have had them from previous endeavours) you can assign a license to your Resource Account. Head over to the 365 Admin Center > Users > Search for your user > More options button > Manage Product Licenses

Tick the Microsoft 365 Phone System – Virtual User license and click save changes
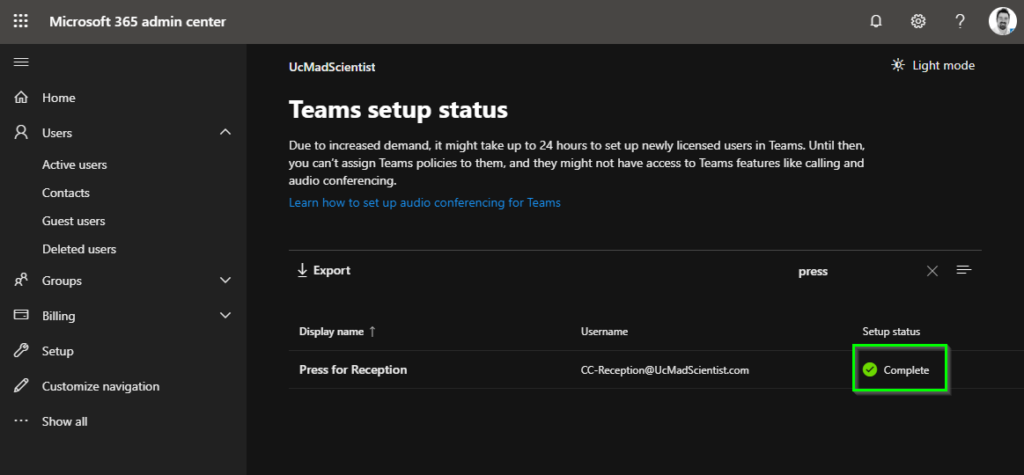
Once you have assigned the licence, check their setup status by clicking the Check Status link in the Active users’ Panel in Office 365.
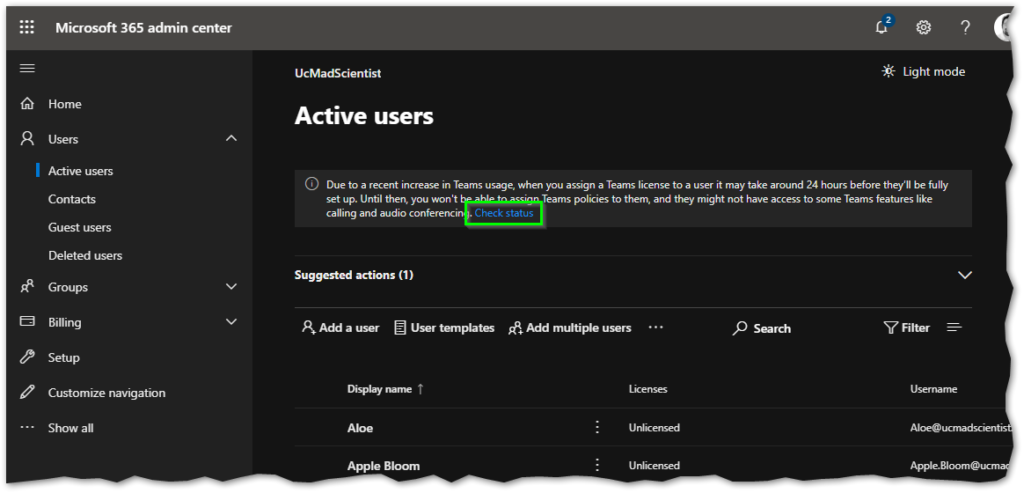
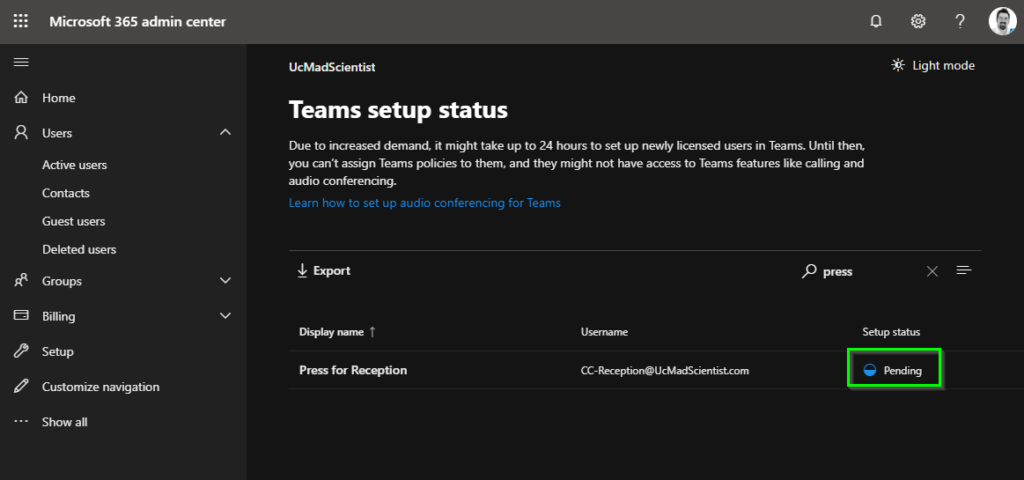
It can take a little while for your resource account to update. (The documentation says up-to 24 hours) But its usually updated within for 10 minutes for me.
Note: You don’t need to refresh the whole page, you can just search again for it to update.
Recommended – Assign a Telephone Number
If this is going to be your main reception queue, you can also assign it a telephone number, but keep in mind if you want to have an interactive menu, time of day rules or holidays you will need to assign your main number to an AutoAttendant instead. (That’s another article)
If you’re getting service numbers from Microsoft, you can assign a number in the Teams Admin Centre by going to Teams Admin Center > Org-wide Settings > Resource Accounts
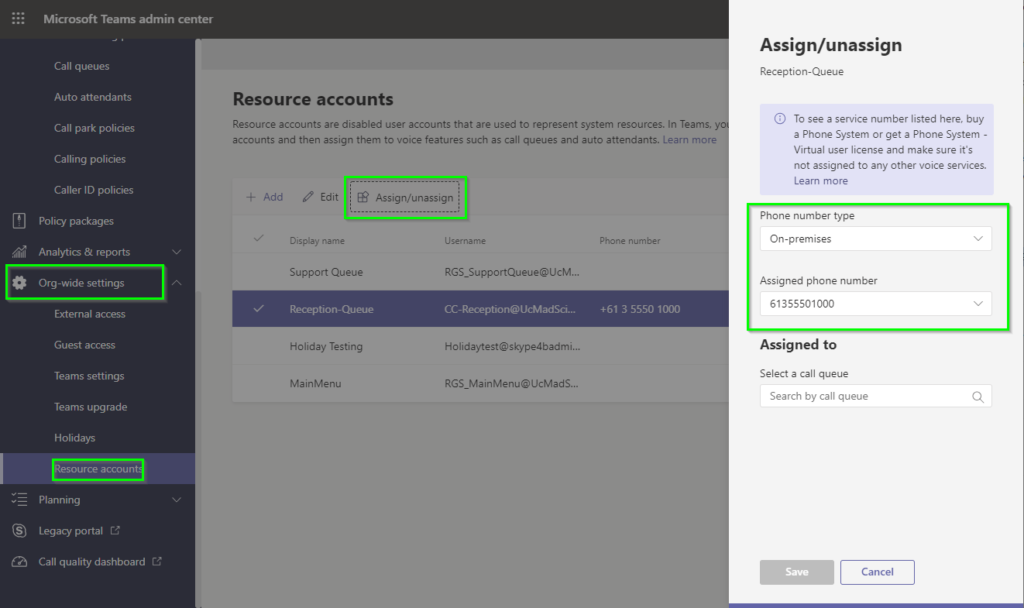
Otherwise, if like me you’re using Direct Route, you will need to follow Randy Chapman’s article on getting things set up for that.
Note: If you are ever going to add a number, its best to do it now. There are known issues with assigning a number after the fact as well as contacts not always appearing unless they have a number.
Failure to do so will mean you will need to delete and re-create the resource account. You have been warned.
If you’re just after the PowerShell for Direct Route, I used this.
Set-CsOnlineApplicationInstance -Identity [email protected] -OnpremPhoneNumber +61355501000
Create the Call Queue
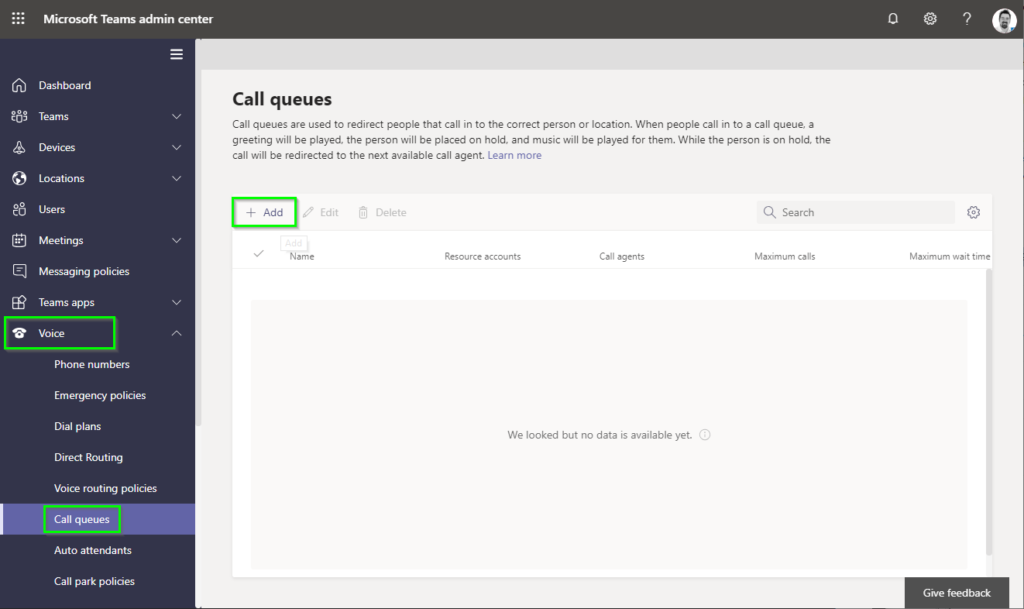
Now we need to create the Call Queue that will receive the call and route it to our agents. In the Teams Admin Center navigate to Voice > Call queues and click on + Add
Name your Call Queue and assign your recently created resource account by clicking Add accounts
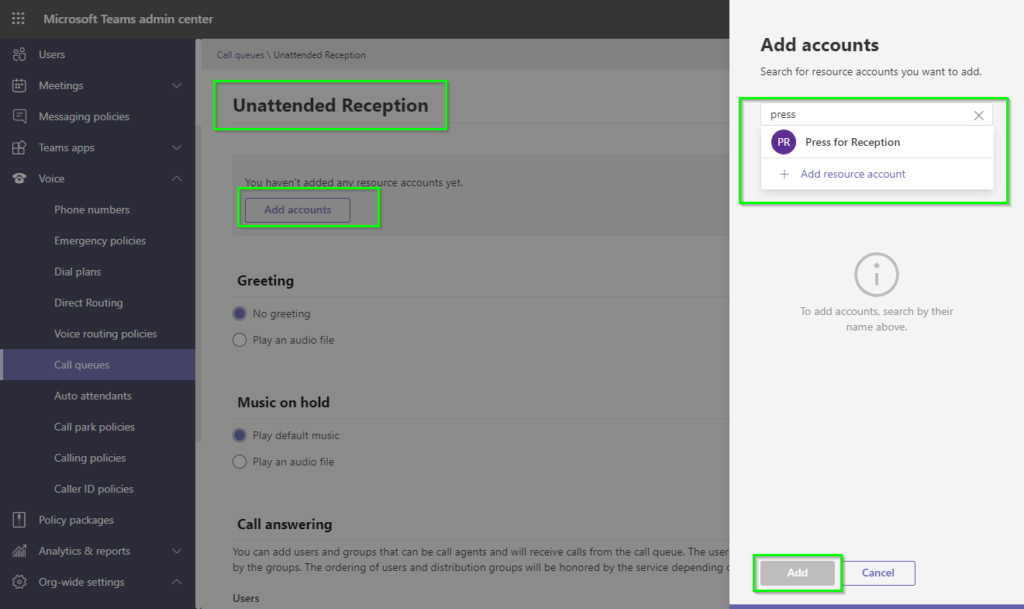
Note: You can assign multiple resource accounts if you want to have multiple numbers or names leading to the same Call Queue.
Configure your other options such as a welcome message and hold music and scroll down to Call Answering
Click on Add users and add all the relevant users, you can also use a 365 Group as well by clicking on Add groups
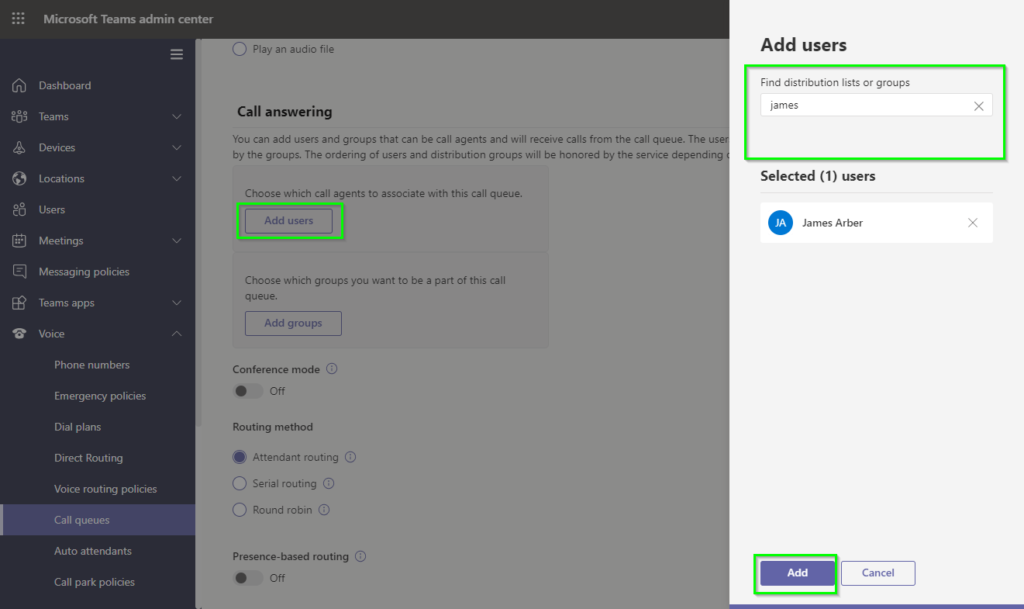
I personally turn on Conference Mode as we are only going to have Teams endpoints answering this call.
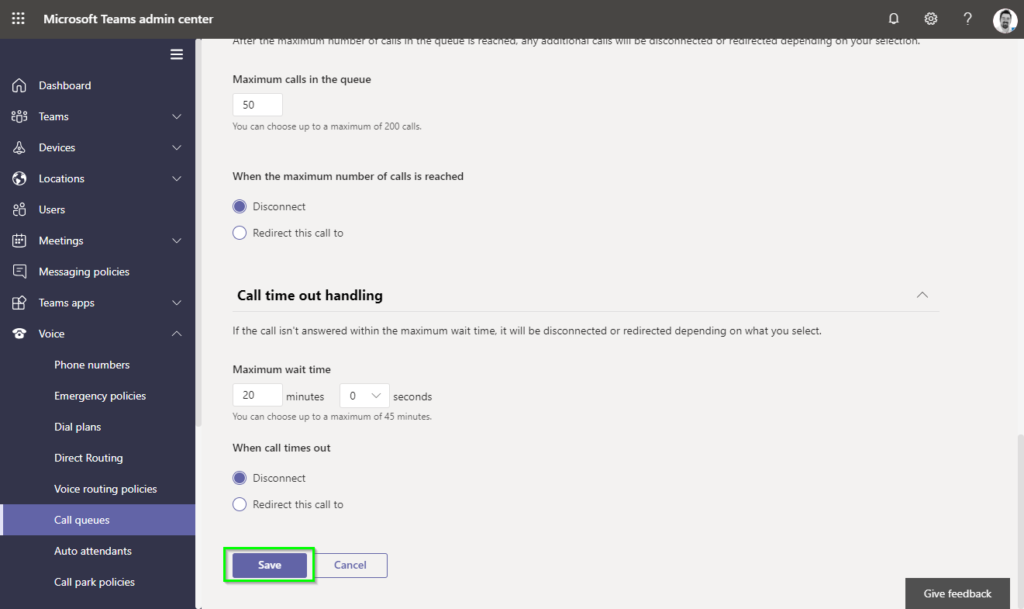
Scroll to the bottom and hit Save
Prepare a phone for the reception desk
In this case, I’m using a Yealink VP59 because it has a built in camera, large touch screen display and can be output to an external screen using HDMI.
Create a user and assign a license and sign the phone in as per normal, Jeff Schertz has a great guide for that over here.
Note: Assigning a Common Area Phone or Meeting Room Policy will remove the speed dial tab. So don’t do it 🙂
Add your speed dials to the Reception Desk account
Now that you have created the reception desk account, you will need to assign the new Call Queue to the speed dials for that account.
The simplest way to achieve this is to sign in to the account using the Teams Web app or the Teams desktop client.
Head to the Calls > Contacts tab, click Add Contact and search for the queue.
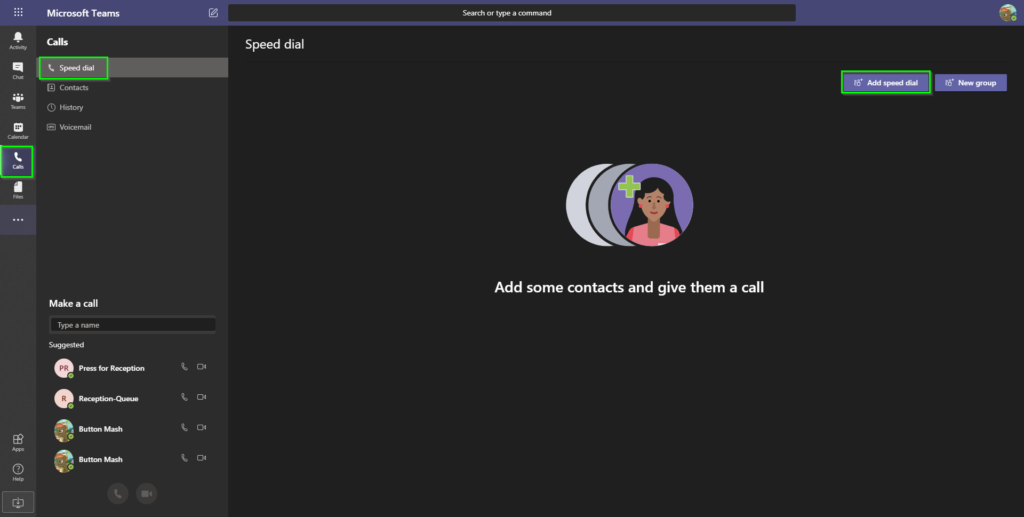
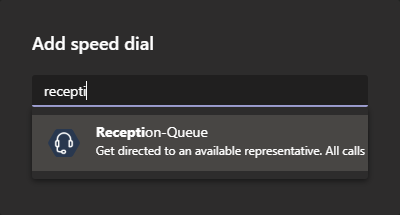
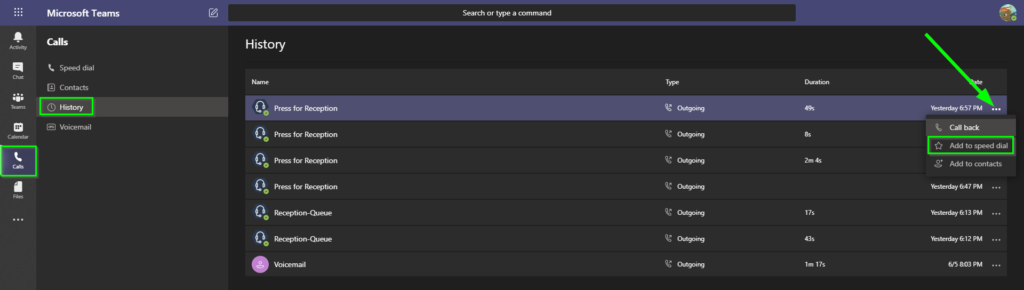
If you cant find the queue by name, try waiting up to 24 hours for the contact to appear in the Azure AD address book. Otherwise, if you added a number to the call queue earlier. Call the number associated with the call queue and then add it to your speed dials from Call History.
A Word about Video.
Call Queues, like many Teams services, leverage the Teams Bot Framework in the back end. As it stands today, the Teams Bot Framework cannot handle video. This means that any call passing through the Bot itself doesn’t support video.
However, the good part about Call Queue’s is that they don’t bridge the call itself. The bot simply plays the hold music and transfers (or conferences) in the destination user using normal Teams API’s. Once the call is connected to the agent, the Bot leaves the call. So we can escalate to video fairly simply after the call is established.
This is a simple case of whoever receives the call turning video on after taking the call. or asking the user to press the camera button on the phone.
Finalize the Phone setup
On the handset itself, navigate to the Hamburger Button > Settings > Device Settings > About and get the phones IP Address
Navigate to the phones IP address in a browser, login as per your default config.

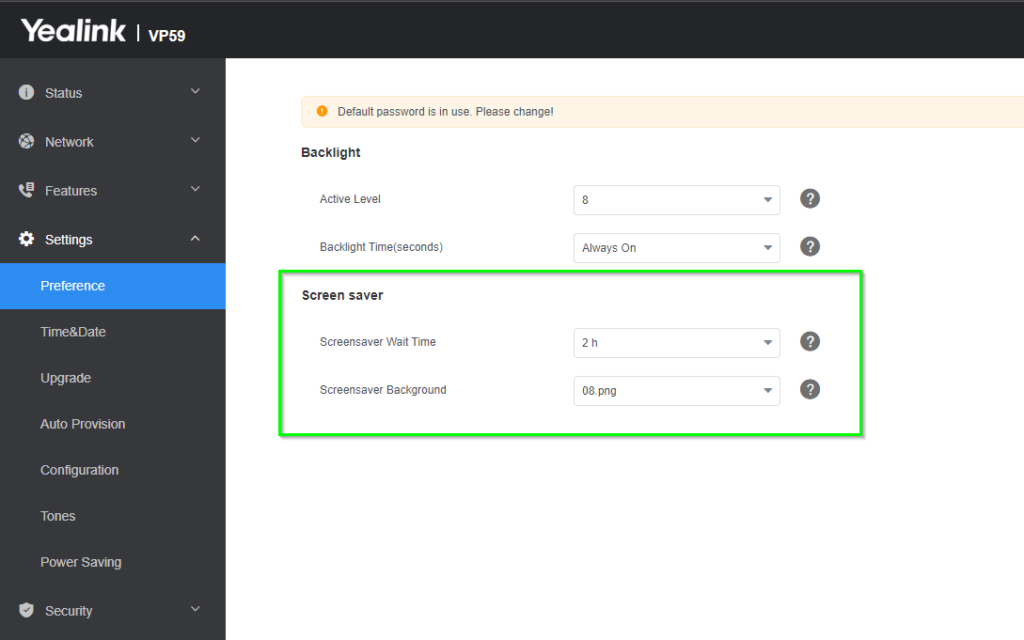
Browse over to Settings > Preference and set the Screen Saver to 2 hours
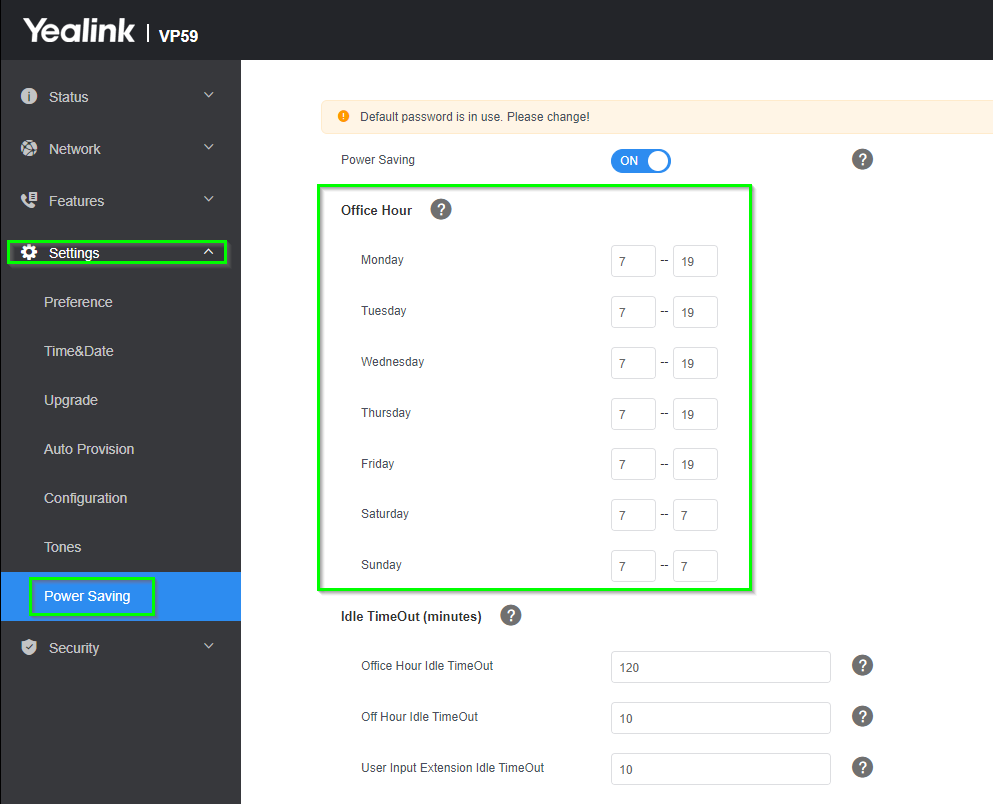
Goto Settings > PowerSaving and adjust your office hours as appropriate.
Now place the phone at your reception.
The cool bit about this is that the VP59 supports WIFI out of the box. So as long as you can power it. you can make it work with Teams.
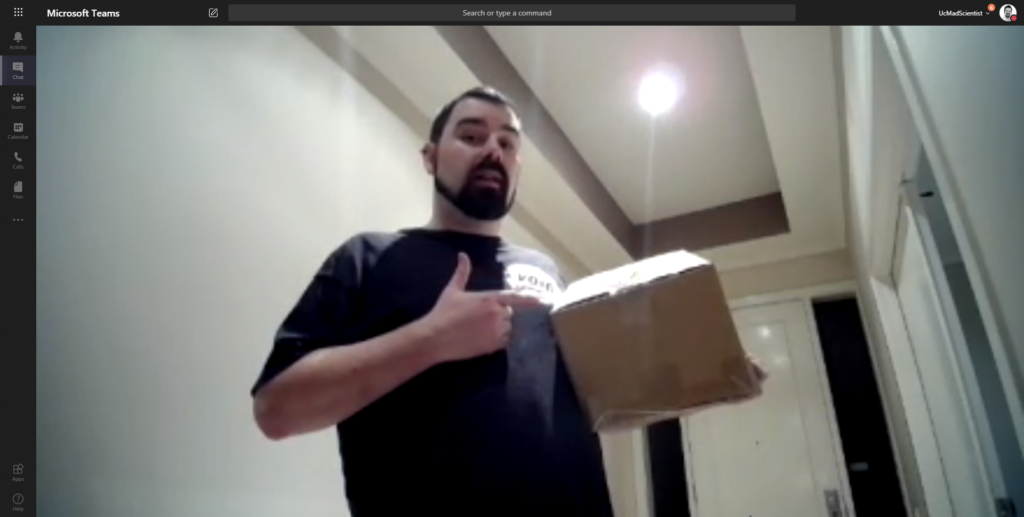
Here it is installed out the front of our study so the kids have to call before coming in.
You can make up a sign like this one in Word too if you like. Download for my template based off an Office template here.

Using it now its all setup.
So now we have a solution for a customer/courier to call anyone that’s in the office and have the security of being able to see them. The best bit about this is that its integrated into all Teams platforms. So I can answer the call on my Teams client on the Desktop, or my Mobile, heck it even works in James Cussens Portals! Tryportals.com
(anyone remember RGS and the Skype mobile client?)


A final word about elegance.
Is this solution perfect? No. But it’s the best we can make do with our enviroment with the functions we have available.
Ideally, we would like to see a few functions come to Teams Phones that their SIP counterparts have had for ages to make a truly elegant solution
- An option to toggle video on by default
- Auto “Off Hook” dialling
- Paging support (Walkie Talkie support maybe?)
- Interopareability with Sip Video for things like Cyberdata’s video intercoms (https://www.cyberdata.net/products/011414)
Revision History
June 26th 2020: Initial Post
June 27th 2020: Corrected a major caption typo thanks to GreigInSydney
January 23rd 2021: Added a note about IP Phone Profiles thanks to Sean Werner
Thanks for the tips. I’ve used your guide as a basis for my Teams Phone experiment. So far I’d say that I’ve come up with the same conclusions. It is feasible with a few caveats. The biggest for me is the lack of any way to use the legitimate call queue function with video by default.
I’m currently testing out using a standard user instead of a call queue. Now on admin interface, I can make a ‘group call pickup’ for an individual user.
1) Created a new user called supportqueue with full Teams and Teams Voice license.
2) In the admin interface for call answering rules I set immediate forward to a group call pickup.
Now. This ends up functioning in a similar way to the regular queue system. It does allow the VP59 I’m using to initiate the call as a video call. It also then allows the Teams client to answer the call as a video call. It’s still not perfect though. The Teams Client when answering with the video button enables video. But the VP59 still enters the call with video off. So you still need the end user on the phone device to press the camera button.
I felt like I was getting really close to a solution more in line with the Zoom Virtual Receptionist.
I kinda feel we are really pushing the limits of a Teams Phone device, I’d really like to get my hands on a Neat Frame or other Large “Teams Display” device to see how they handle this scenario as they are more a “Video first” kinda device.