Note: This version of the article has been updated for Azure Bot Service SDK v4 the older one can be found here for archival reasons.
Six months ago I published the old version of this article after having to quickly fill in for another MVP at a user group session. Today I’m publishing it again with the much simpler steps using the new version of the Chat Bot Service and QnAMaker.
Note: This is a session I’ve given at the Melbourne UC user group and the Sydney UC user group.
I gave a live demo from start to finish on how to make a simple QnA bot for Microsoft Teams using QnAmaker.ai and Azure cognitive services. Feel free to contact me if you would like me to present this at your event.
Building a Bot Without Code! How? Why?
It’s a lot simpler than you might think. First things first however, I need to credit Loryan for giving me the idea. He had originally intended to present a similar themed session but got called off to Ignite 😀
Not all of us are code cutters / developers. Sure things like PowerShell really blur the lines between development and operations. Hence the DevOps movement. But there is a clear difference between a developer that writes applications / services and an admin that writes code to simplify technical tasks.
Yet there are still needs for some basic interactions with users using Microsoft Teams and a data source, a process or even some other system and I’ll go into some of the other methods like PowerApps and Flow in another article.
So why would I want to build a bot for Microsoft Teams using Microsoft Cognitive Services?
Let me ask you this, how many times have you used a personal assistant like Cortana, Google Assistant or Alexa to pull information from an online service? Something like “Hey Cortana, What’s the velocity of an unladen swallow?” or “What time does the servo close?”
The cognitive services behind whatever assistant tries to understand the context of your question, searches it’s data sources and tries to answer the question as best it can.
It will sometimes try to provide a bit of context to this by perhaps showing a snippet of data or where it got it from.
See an example of Google’s cognitive services in action (Sorry Bing, you didn’t get the joke)

You can see I asked the service in simple terms (1) “What’s the velocity of an unladen swallow”
and it tried its best to provide an (2) answer with a bit of context, and then provides a link with a (3) source for its information.
Well with a bit of help we can get a Microsoft Teams Bot to do similar things by puling data from;
- An FAQ
- A “How To” document
- A Wiki Page
- User information from Sharepoint
- Data from a Knowledge Base
- Even a user manual
Okay, you have sold me / I just want to build the bot already! What do I do?
- Create Knowledge Base on QnAMaker.Ai
- Create App Service in Azure (if needed)
- Let QnAMaker make a Web App Bot Service
- Link Azure and Teams
- ???
- Profit!
Okay, maybe its not quite that simple, but its simple and quick enough I did it in 20 minutes on stage. So lets go through it.
Your going to need a few things to get started
- A Microsoft Teams Tenant (Obviously)
- A Microsoft MSA Account
- An Azure Account (A free one works fine)
- Data in a Supported Format to feed the AI hamsters (Webpages, Word Docs, PDFs)
To get this up and running we don’t need to spend any extra money. This is all hosted on my Teams tenant with my free Azure account. I’ve even gotten it talking to a free Teams tenant.
(A note here on the free tenant, I got caught here, if you exceed the 30 day trial Azure will protect you from spending any money by disabling your account. This will make it appear like all your data in QnAMaker is gone. It’s not! you just need to re-enable your account, its still included in the free services)
Creating the Azure QnA Maker Service
First off we need to create the required services in Azure, so head over to https://www.qnamaker.ai, click Create a knowledge base and login using your MSA account if requested.

Click on the Create a QnA service button. This will take you into Azure to create a new QnA maker service in your Azure tenant.
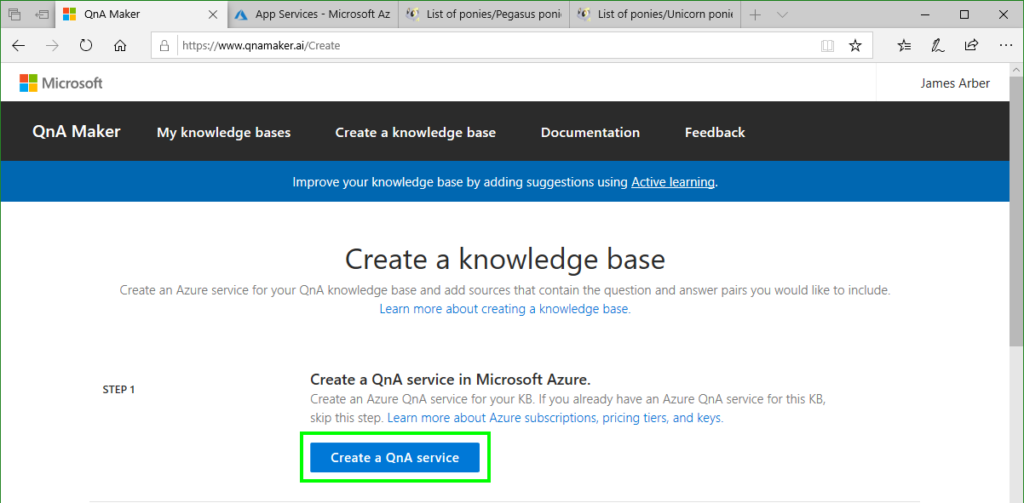
Once you sign into the Azure portal, you should automatically be taken to the Create a resource page to create a QnA Maker resource.
You will need to change the Website Location first at the bottom of the page to another region (I used West US) for the pricing tier options to appear.

Now, fill in the Name, pick your Pricing tier, Search pricing tier, App name. I personally disable app insights as well, then click Create
When you fill in the App name, keep in mind this is unique subdomain at azurewebsites.net so you will need to find a unique name to not conflict with someone else.

You will get a notification that the deployment is in progress in the notifications area of Azure.

It usually takes a few minutes, but eventually you should see a notification that your deployment is complete.

Feeding Your Bot
Head back to your QnAMaker tab and continue with Step 2 by first clicking Refresh then picking your Azure tenant, Subscription and the new Azure QnA Service you just created.
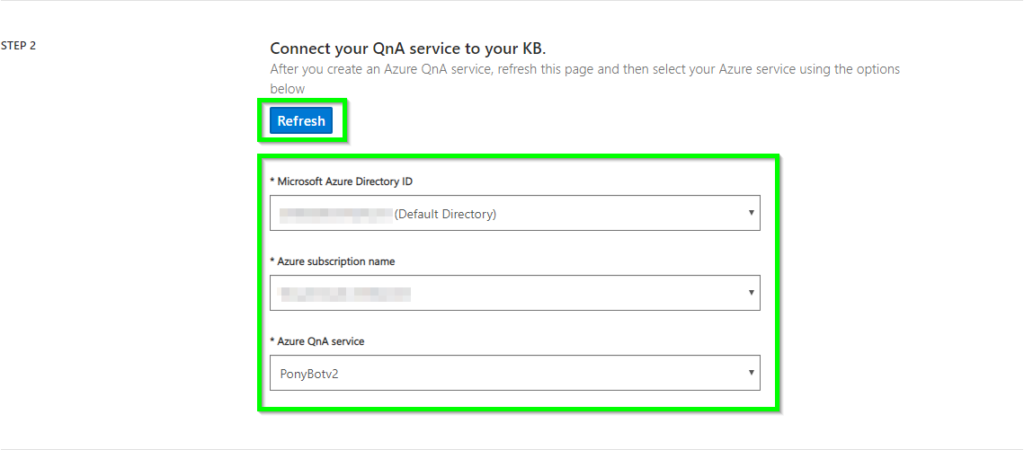
Now lets give it a meaningful and easy to remember name that anyone will be able to make sense of.

Great, now lets get some data and feed it to the bot for your users to consume, start by populating it with data from the supported data sources.
Keep in mind the free version only supports 3 data sources, and the Chit Chat file is considered a data source as well, So if you need more data you can disable chitchat.
The data must be publicly accessible if its a wiki/webpage. If you have something that is behind a security wall of some description you will need to export it to a supported file format and upload it into QnAMaker
Note I used to use the MLP Fandom Wiki, but something changed with all the advertising and now QnA maker cant scrape it properly. So I made my own. See here for my example data.
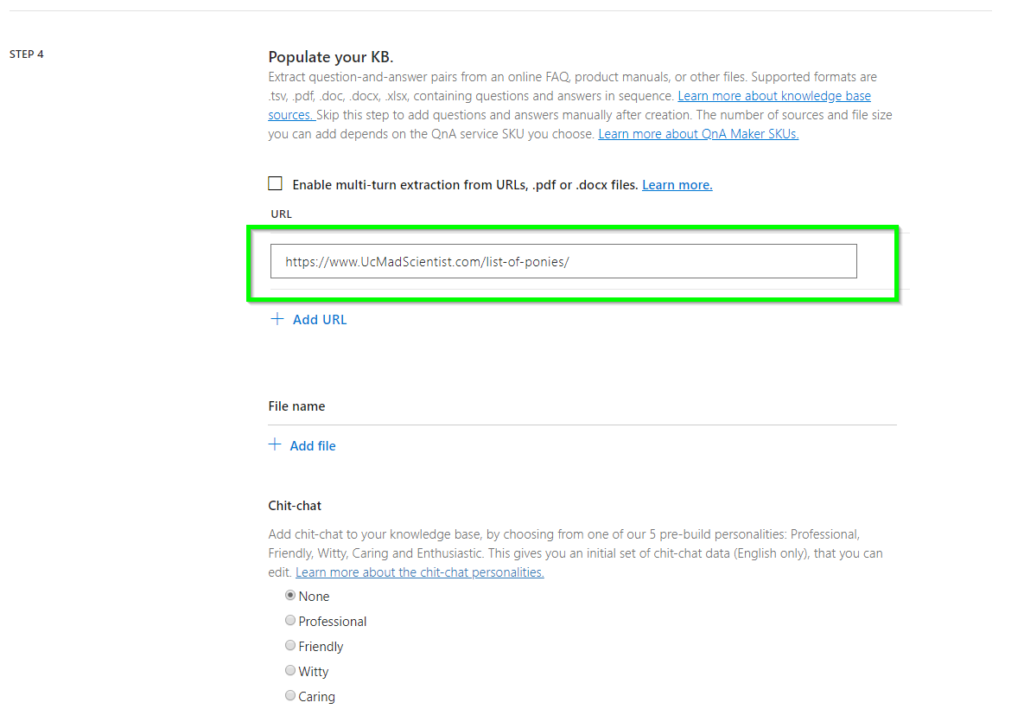
Now Click on Create your KB and let the magic happen

QnA Maker will start crawling your data and start creating Question and Answer Pairs

Whilst we wait for QnA Maker to crawl your data, head back over to Azure and create a Web App Bot service
Finalizing the QnA KB
Cool, Now. Lets head back to the QnAMaker setup. You should have a whole bunch of Question and answer pairs based on your data.
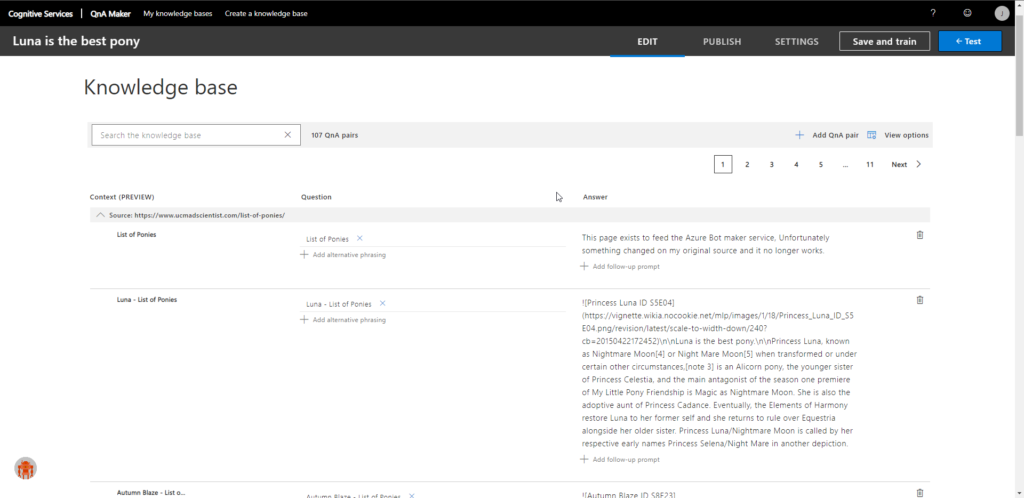
Click on Test and try talking to your QnA Bot. (We clearly disagree on who the best pony is..)

See if the expected data comes back, try pulling some more data from the wiki
If not you can manipulate the KB by closing the test pane and editing it directly and testing again
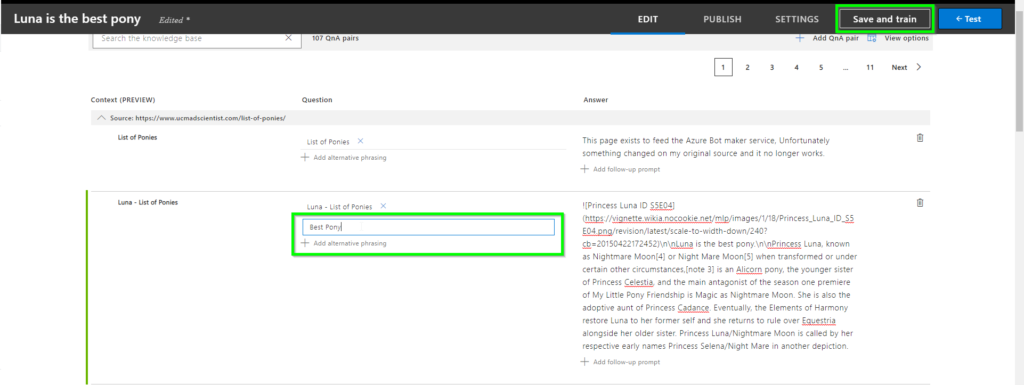

Much better.
What about adding custom entries?

In the above example I return a gif for the keyword boop using a custom question answer pair by using the code below in the answer field. Mark Down is supported.

Adjust, train and retest as necessary, but when you’re ready, click on the Publish tab and click Publish

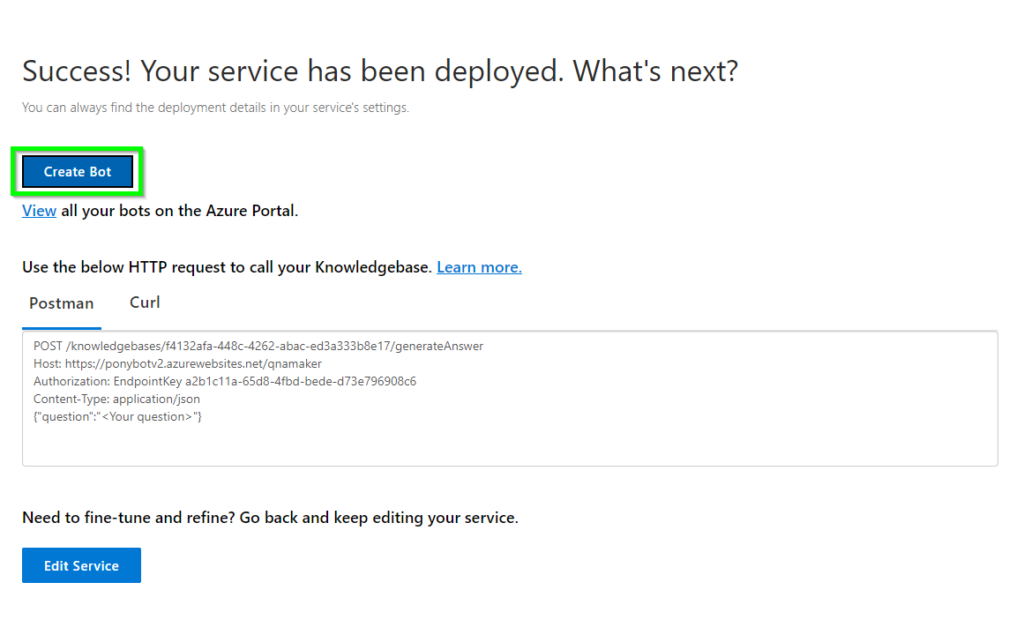
Once you click on publish you will be taken to a page advising your new QnA Service has been deployed. It will also show some key data that we used to need in v3. In v4 this whole process has been automated for us.
Click on Create Bot to be taken to Azure with pre-configured settings for a new Bot.
Creating the Azure Bot Service
Thanks to QnA Maker, most of the settings here have been filled in for you. You may need to change the location to get Azure to show a pricing tier. I recommend West US
Don’t forget to change the pricing tier back to free!

Now click on Create
If when you click Create you get an empty error message like this, try changing the bot handle

Same as before, you will get a notification that the app is being deployed.

That will eventually update to say the app has been deployed.

Once it’s deployed, Click on Go to resource and lets test this out.
Linking your Bot to Services.
Okay, now we know the Bot is working in The QnA maker, lets make sure the Web App is talking to it. (if you need to find it again, head to All Resources and set the type to Bot Service)

Click on Test and ask your bot some questions


Click on Channels and then Teams

There is nothing to configure here for messaging. If you want to get into Voice, Matt Landis has some stuff on the subject. But for now just click on Save.
You should then get prompted to accept the terms and conditions. Click on the Checkbox and click Agree

Eventually you will see a Saved notification

Unfortunately, even in the new SDK. The page doesn’t go “back” by itself. So, click on Overview and then on Channels and Microsoft Teams

This will open a new tab that will try to invoke Teams. Click on your preferred method and you will be taken into a private chat with your freshly made bot.

Congratulations, you have made a bot and connected it to Teams. Without a single line of code or messy API keys like in V3
Now our bot isnt perfect, you need to send the URL to anyone that wants to use it. and it only works in private messages.
But it will communicate with any Tenant as long as the Admin has it enabled and the user has your URL. It even works in Teams Free Edition. The screenshot above is actually from my Dungeons and Dragons, Teams Free instance.
Next time, we will talk about using App Builder and publishing our apps to your tenant’s repo or even the Microsoft Store.. and you can test it all without needing to setup a SSL certificate or web server!