


Part 2 The Return of the VB ISE!
This is a continuation of my adventures into moving to Visual Studio from the Powershell ISE you can find Part1 over here, go read that if you havent to get all caught up.
Right, When we left off we had just installed Visual Studio, Connected it with Visual Studio Team Services and created our first Project on the Visual Studio Team services site. That’s all fine and good, but what about actually using it? Well that’s simple enough.
In this part we are going to go over Repo/Workspace management.
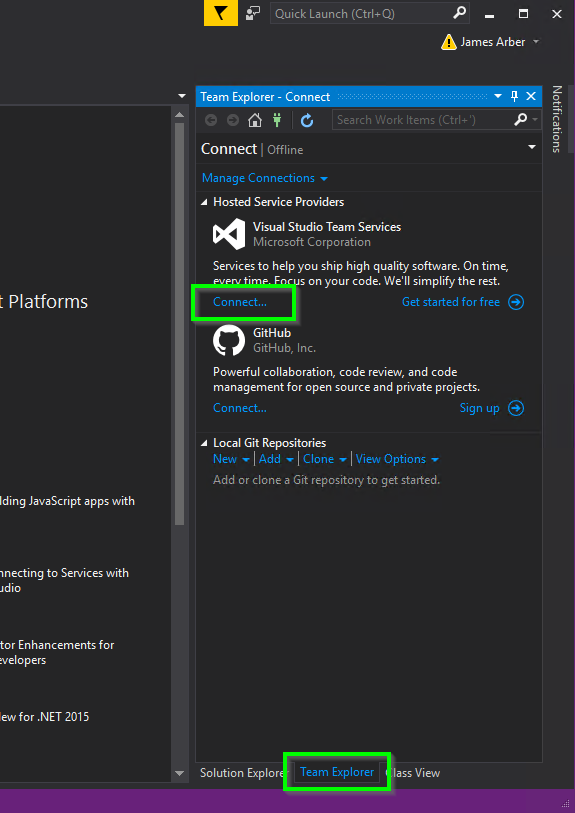
In Visual Studio, Navigate to the Team Explorer tab and click “Connect…” under Visual Studio Team Services
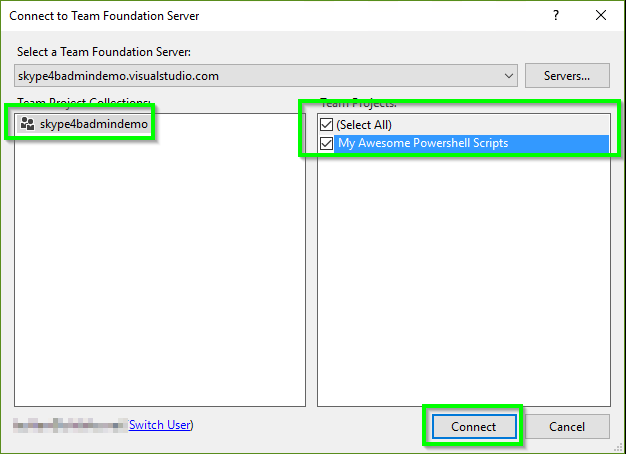
Choose your Visual Studio Team Services Site from the drop down menu and sign in (if it’s not there, make sure your signed in to Visual studio or you may need to connect from the site)

Visual Studio will now connect to Visual Studio Team Services and show a list of Projects and Teams your account is associated with.
Select your project, or the relevant one if you have multiples and click “Connect”
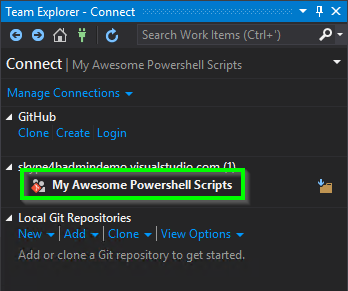
This can take some time to connect and populate so be patient.
Once that is finished, you will be presented with a list of Projects. Double click on your new project. (or an existing one if your part of a team)
Visual Studio will prompt you to “Clone” the repo, This downloads the code (which doesn’t exist yet) to your local machine for you to edit.
Click on “Clone this repository” and then “Clone” to begin the process. (you can change the path too if you don’t have one defined)
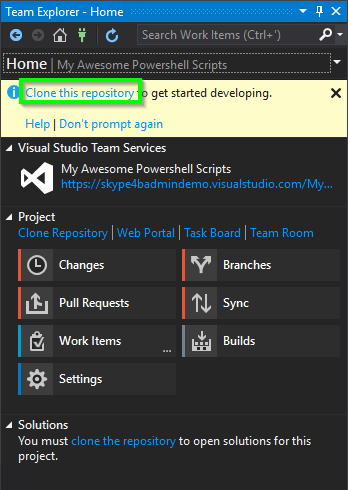

Visual Studio will clone the repository for you, however as we haven’t defined a Solution yet, it will show no solutions.

It’s also worth pointing out now the Git controls should have appeared in the status bar
These will be explained in more detail later, but if they haven’t appeared something might be wrong.

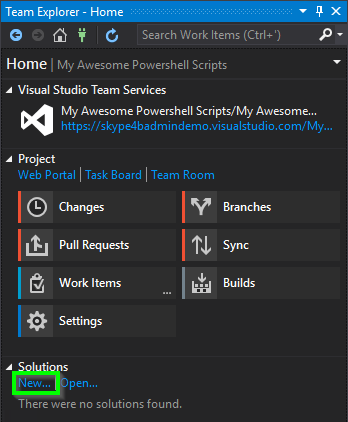
Lets get our first Solution on the repo then
Click on “New…” under Solutions.
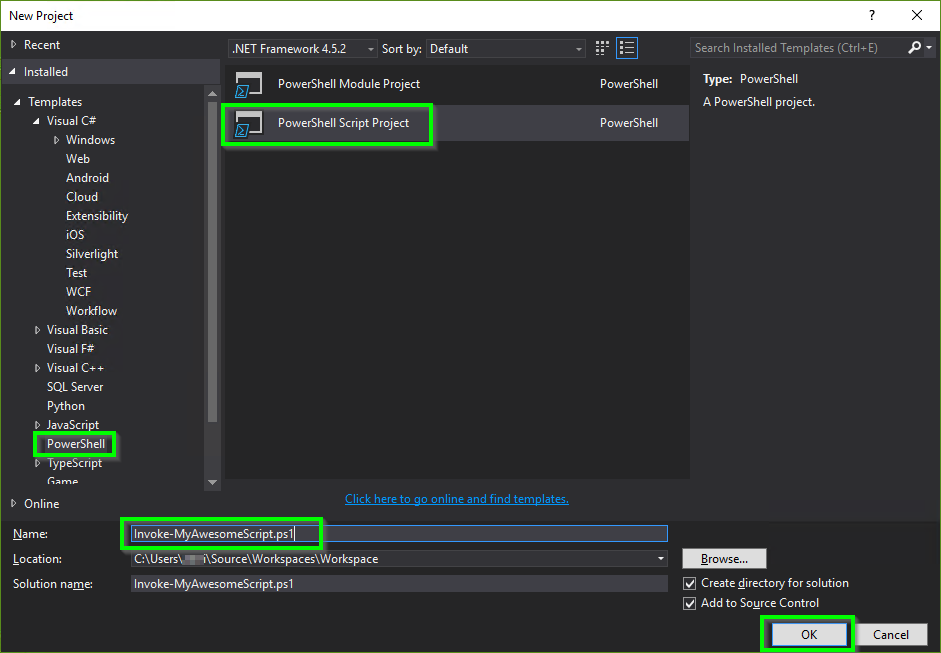
Now Visual Studio is going to ask you some questions about the project.
Select PowerShell in the left pane and make sure you click “Powershell Script Project” in the middle pane.
Name the project as if it’s the expected filename (don’t forget Verb-Noun syntax) and click OK
Visual Studio will automatically create a folder under your workspaces for the script and add it to your local Git repo
You will be dropped into the ISE ready to go. Note that the “Solution” has been added to your local repo.
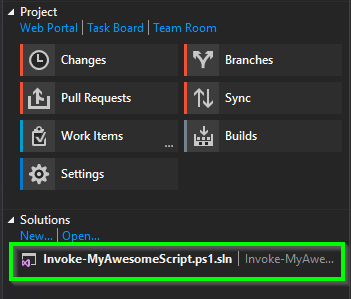
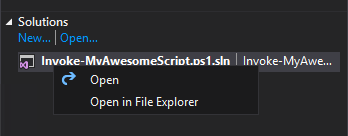
This “Solution” is a folder in your repo and currently doesn’t contain anything. You can browse the Solution by right clicking on it and clicking “Open in File Explorer”
Anyway, you will see that you have a default PowerShell script in the ISE called “Script1.ps1”
For anyone that’s used a Microsoft development ISE before, this layout is going to be very familiar.
Heck I learned in VB5 and the interface still follows the same principles.
Code on the left, Objects on the right, with Object properties underneath.

As were now working with the script, and not the version control or repo systems, lets switch over to the “Solution Explorer” tab in the Object Navigation section.
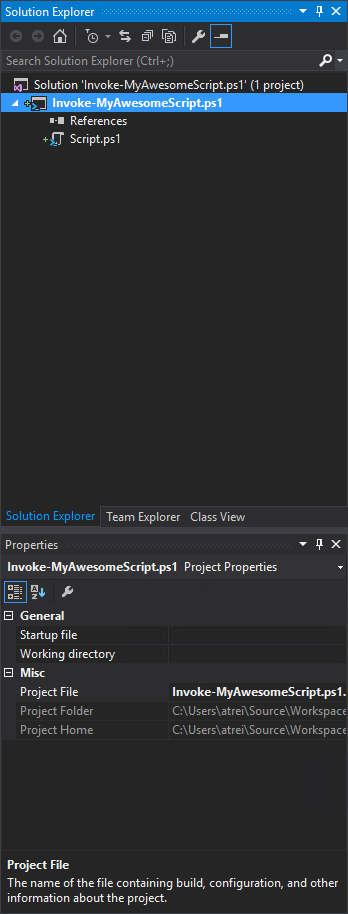
Now you can see we have a tree view of the project, it doesn’t contain much at the moment, just our script… but it’s called “script.ps1” that’s not what we want (is it?), you can also see down the bottom the properties of the project (the file we run on startup and the like, these are less relevant for PowerShell Scripts)
You can store all sorts of stuff that’s relevant to the project in this folder and reference/edit them in visual studio.
The advantage of doing it that way is that all the referenced files are covered by Git’s version control
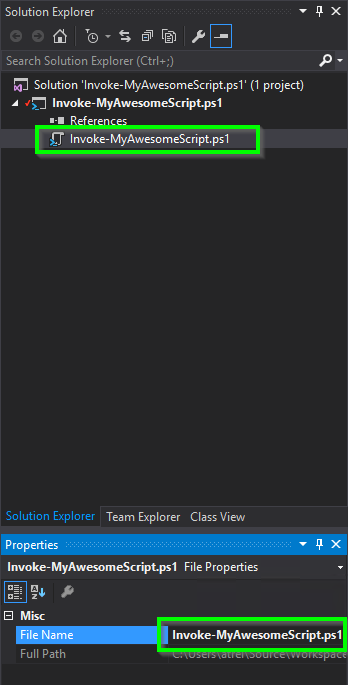
Click on the Script1.ps1 object and the properties area will update to show the actual scripts properties, but as it’s a PowerShell script there isn’t a lot here.
Now update the File Name property and you will see the object automatically update in Solution Explorer.
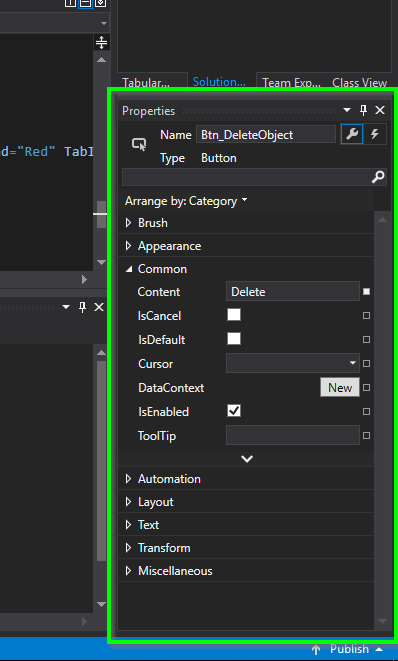
Just as an example, this section is used A LOT more when working with other types of code (WPF, VB# C# etc)
In this case, I’ve selected a Gui item (the delete button) and you can see the properties pane has updated with relevant information
This will all make sense later as we get into the GUI Stuff..
Anyway, back to PowerShell.
Now that we have set the properties correctly, we can add some code in the main window.
If you want to play along, here’s my code.
You can also learn more about the header code I’m using to add get-help support to my cmdlets here https://technet.microsoft.com/en-us/library/hh847834.aspx
<#
.SYNOPSIS
This is an example script
.DESCRIPTION
This is my awesome script written in Visual Studio to show off its PowerShell and Git support
Created by James Arber. www.skype4badmin.com
More info on on working with Visual Studio and PowerShell here https://www.UcMadScientist.com/how-i-moved-from-the-powershell-ise-over-to-visual-studio-for-my-skype4b-scripts-part-1/.NOTES
Version : 1.0
Date : 11/10/2016
Lync Version : Tested against Skype4B 2015
Author : James ArberRevision History :v1.0: Initial Release
.LINK
http://foo.skype4badmin.com/how-i-moved-from-the-powershell-ise-over-to-visual-studio-for-my-skype4b-scripts-part-1/
.EXAMPLE
PS C:\> Invoke-MyAwesomeScript.ps1
Starts the script and throws an error#>
# Script ConfigWrite-Host “This is some example output”
We can now save and test this script.
Click on the Save icon, then click “Start”

Note the Yellow bar on the left has turned Green?
This is to show you code you have worked on this session. Yellow is unsaved changes, Green is new/changed code this session.

You can also see the Output of the script in the Output window at the bottom after you ran the script

Okay, so we have made a project, added some code and saved it. How does version control come in?
Check out Part3 for more info.
Pingback: How I moved from the Powershell ISE over to Visual Studio for my Skype4B scripts Part 1 – Skype4BAdmin.com
Pingback: Move Powershell ISE to VisualStudio Part3 | Skype4BAdmin.com